Visar inlägg med etikett Engelska. Visa alla inlägg

onsdag 6 februari 2013

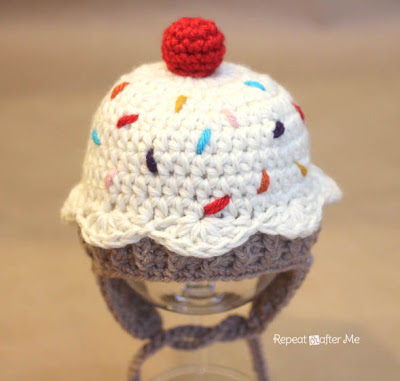
Cupcake Mössa!


Materials:
- Worsted weight yarn in cream and brown. I used Ashland Bay Montana 100% Targhee wool yarn doubled up for the main part of the hat and Loops & Threads Impeccable Yarn in soft taupe for the bottom part of the cupcake. If you are using a regular worsted weight yarn like Vanna's Choice you only need to use one strand (don't double up).
- Size H crochet hook
- Tapestry needle
- Colored yarn scraps for the sprinkles
- Red worsted weight yarn for the cherry

Abbreviations:
Magic Ring= Find the tutorial HERE
ST= Stitch
SC= Single Crochet
HDC= HD
DC= Double Crochet
FPHDC= Front Post Half Double Crochet
BPHDC= Back Post Half Double Crochet


Cupcake Hat Pattern:

Size: 0-3 months
Magic Ring, chain 1, 9 HDC in ring, join, chain 1
Round 2: Work 2 HDC into each st around, join, chain 1 (18 HDC)
Round 3: 2 HDC in first stitch, HDC in next, Repeat around, join, chain 1 (27 HDC)
Round 4: 2 HDC in first stitch, HDC in next 2, Repeat around, join, chain 1 (36 HDC)
Round 5: 2 HDC in first stitch, HDC in next 3, Repeat around, join, chain 1 (45 HDC)
Round 6-9: HDC in each stitch around, join, chain 1 (chain 3 at the end of round 9) (45 HDC)
Now you are going to make the shell edge...
Round 10: Make 4 DC in the same stitch as your chain 3, skip 2 stitches, SC, skip 2 stitches, *make 5 DC's all in one stitch, skip 2 stitches, SC, skip 2 stitches, repeat from * the rest of the way around. Join to bottom of chain 3. Fasten off and weave in ends.
Round 11: Now it gets a little complicated. You are going to want to switch colors to brown (or whatever you are using for the base of the cupcake) and join the yarn to round 9 (not the shell edge). You will have to flip the shell edge up and look for the row of stitches from round 9. Chain 1 and HDC in each stitch around, join, chain 1. (You should end up with 45 HDC) It should look like this:
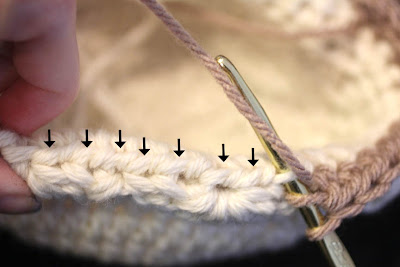
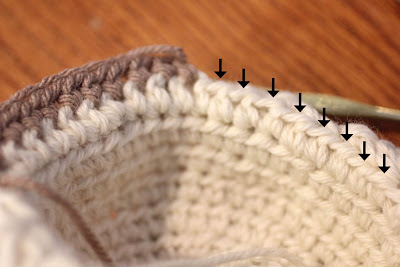

Round 12-14: FPHDC in first stitch, BPHDC in next, repeat around, join, chain 1
Here is a video tutorial on how to make the FPHDC and BPHDC:


Now begin on first earflap as written below.

Earflap 1:
Chain 1, SC in next 10, chain 1, turn
Row 2: SC decrease, SC in next 6, SC decrease, chain 1, turn
Row 3: SC across (8 SC)
Row 4: SC decrease, SC in next 4, SC decrease, chain 1, turn
Row 5: SC across ( 6 SC)
Row 6: SC decrease, SC in next 2, SC decrease, chain 1, turn
Row 7: SC across (4 SC)
Row 8: Make 2 SC decreases, chain 1, turn
Row 9: SC decrease, fasten off, weave in ends

Earflap 2:
Leave 15 stitches in front
Join yarn, chain 1, SC in next 10, chain 1, turn
Row 2: SC decrease, SC in next 6, SC decrease, chain 1, turn
Row 3: SC across (8 SC)
Row 4: SC decrease, SC in next 4, SC decrease, chain 1, turn
Row 5: SC across ( 6 SC)
Row 6: SC decrease, SC in next 2, SC decrease, chain 1, turn
Row 7: SC across (4 SC)
Row 8: Make 2 SC decreases, chain 1, turn
Row 9: SC decrease, and continue to SC around hat and earflaps, when you get to the top of each earflap: chain 40 (or as long/short as you wish), slip stitch in 2nd chain from hook and the rest of the way down the chain. Continue to SC around the hat and fasten off when you get the entire way around.

Crochet Cherry Pattern:
Magic Ring, chain 1, make 6 SC inside the magic ring, pull tight and continue to SC in rounds (do not join) use a stitch marker if needed.
Round 2: 2 SC in each stitch around (12 SC)
Round 3-4: SC in each stitch around (12 SC)
Round 5: *SC decrease, SC, repeat from * the rest of the way around, join, and fasten off leaving long tail.
You should now have an opening at the end that you will need to stuff with extra yarn or a small amount of poly-fil. Use the long tail to sew the cherry onto the top of the hat.

Sprinkles:
Use scrapes of colored yarn (I used red, orange, mustard yellow, turquoise, light pink and purple) and with your tapestry needle, sew the yarn on in random spots so they look like long sprinkles.

måndag 3 december 2012

Snöflinga


Supplies:
White/Pearl crochet cotton thread - size 10 (I used Royale brand, from Michaels)
Crochet hook - size 7

Note: The "humps" of a chain are the threads that are on the backside of the chain, that sort of look like dashes "- - - - -", and they run right down the center of the backside of the chain.  While you are crocheting, if you twist your work in your hand, just slightly, you can easily see, and crochet into, this back "hump" part of a chain.

How to make a Magic Loop: Leave the first 6 inches of your crochet thread hanging down, un-worked, and then make a one inch diameter loop, putting the short 6 inch thread behind the working thread. Hold this loop in place with your hand that doesn't hold your crochet hook.  Next, put your hook through the loop, and catch the working thread onto your hook.  Pull the working thread through the loop to the front side.  You are now ready to start with the "chain 4" that the pattern starts with.   Confused?  Here's a link to some Magic Loop intructions, at Crochet Me, that has photos: http://www.crochetme.com/Dec_Jan_0405/reads_round.html

RND 1:
Make a magic loop (see above), and chain 4 (counts as 1 dc and 1 chain).

[Dc, ch 1] 5 times in loop.  Close loop by pulling on the end of the thread.  Slst in the 3rd chain of the beginning chain.  (This equals a total of 6 dc and 6 chains for the round.)


RND 2:
(Chain 2, slst in next space, chain 6, slst in next dc) 5 times.

Chain 2, slst in next space, chain 3, dc in same top of the beginning chain 3 of round 1.


RND 3 :
Slst in space just formed, chain 3.  Mark third chain with a gold safety pin.

Dc, ch 1, sc in same space.  *Chain 3, slst in next "chain 2" loop, chain 3. In next loop make (sc, chain 1, dc, trc, dc, chain 1, sc).  Repeat from * 4 times.

Chain 3, slst in next chain 2 loop, chain 3. In next loop make sc, chain 1, dc, and then join in chain marked with the gold safety pin.  LEAVE SAFETY PIN IN PLACE.


RND 4:
In same loop as safety pin, make a chain 3, sc, chain 5, sc, chain 3, sc.

**Chain 3.  One sc in each next 2 loops.  Chain 3.  Make (sc, chain 3, sc, chain 5, sc, chain 3, sc) in the next triple crochet (which is located in center of the next scallop).  Repeat from ** four times.

Chain 3.  One sc in each next 2 loops.  Chain 3. Join, with slst, in same loop as the safety pin.  LEAVE SAFETY PIN IN PLACE.


RND 5:
***(Chain 4, dc in back "hump" of 4th chain from hook).  Repeat between ( ) once.

Slst in next loop, chain 4, dc in back "hump" of 4th chain from hook.

Chain 3, slst in back "hump" of 3rd chain from hook.  Chain 3, slst in same place as last slst.  Chain 2, again slst in same place as the last slipstitch.

Chain 4, dc in back "hump" of 4th chain from hook, skip next loop, and slst in next loop.

(Chain 4, dc in back "hump" of 4th chain from hook).   Repeat between ( ) once.  Slst in next sc.

Chain 3, slst between next 2 single crochets. Chain 3, slst in next sc.

Repeat from *** 5 times, ending with slst in same loop as the safety pin.  Fasten off, remove safety pin, and hide ends in work.


torsdag 18 oktober 2012

Shell Stitch Beanie


I said I would post a free patttern, so here it is. This is a pattern for the shell stitch beanie in my previous post. I LOVE this beanie because it stitches up quickly and adds a great texture to the average beanie. The pattern here is for a 0-3 months size and a child size (3-10 years), but I hope to add in the other sizes when I find a moment. Please let me know if something doesn't work up right. As always, I would love to see pics of final creations! If you whip one of these out, please email me a picture!

Hook: J
Yarn: Bernat Satin. I have used all different kinds of yarn for this though.


0-3 Months
Rnd 1: ch 4, join to form ring

Rnd 2: 6 sc in ring, DO NOT JOIN (you may want to place a marker here to keep track of Rnd)

Rnd3: 2 sc in each sc of previous round (12 sc)

Rnd 4: (2 sc in next stitch, 1 sc in next stitch) 6 times, (18 sc)

Rnd 5: (2 sc in next stitch, 1 sc in next 2 stitches) 6 times (24 sc)

Rnd 6: (2 sc in next stitch, 1 sc in next 3 stitches) 6 times (30 sc)

Rnd 7: (2 sc in next stitch, 1 sc in next 4 stitches) 6 tmes (36 sc).

Rnd 8: ch3 (this counts as first dc), dc in same stitch, ch 1, 2dc in same stitch, *skip 3 sc, (2 dc, ch 1, 2 dc) in next sc* repeat from * to beginning chain. Join. (for extra help click here).

Rnd 9: Slip Stich to ch 1 space, (ch 3, dc, ch 1, 2dc) in first chain 1 space, (2dc, 1 ch, 2dc) in each ch 1 space around. Join.

Rnd 10-14: repeat Rnd 9

Rnd 15: ch 1, 1 sc in same stitch and in each stitch around, join

Rnd 16: repeat Rnd 15

Finish Off


3-6 MONTH SIZE:


Rnd 1: ch 4, join to form ring 


Rnd 2: 6 sc in ring, DO NOT JOIN (you may want to place a marker here to keep track of Rnd)


Rnd3: 2 sc in each sc of previous round (12 sc)

Rnd 4: (2 sc in next stitch, 1 sc in next stitch) 6 times, (18 sc)

Rnd 5: (2 sc in next stitch, 1 sc in next 2 stitches) 6 times (24 sc)

Rnd 6: (2 sc in next stitch, 1 sc in next 3 stitches) 6 times (30 sc)

Rnd 7: (2 sc in next stitch, 1 sc in next 4 stitches) 6 tmes (36 sc).

Rnd 8: (2 sc in next stitch, 1 sc in next 5 stitches) 6 times (42 sc)

Rnd 9: ch3 (this counts as first dc), dc in same stitch, ch 1, 2dc in same stitch, skip 3 sc, (2 dc, ch 1, 2 dc) in next sc repeat from * to beginning chain. Slip Stitch to Join. (before you join you will notice that there is an extra stitch ignore and join :))  For extra help click here.

Rnd 10: Slip Stich to ch 1 space, (ch 3, dc, ch 1, 2dc) in first chain 1 space, (2dc, 1 ch, 2dc) in each ch 1 space around. Join.

Rnd 11-14: Repeat Rnd 10

Rnd 15: ch 1, 1 sc in same stitch and in each stitch around, join.

Rnd 16-19: Repeat Rnd 15

Finish.


6-12 MONTHS:

Rnd 1: ch 4, join to form ring

Rnd 2: 6 sc in ring, DO NOT JOIN (you may want to place a marker here to keep track of Rnd)

Rnd3: 2 sc in each sc of previous round (12 sc)

Rnd 4: (2 sc in next stitch, 1 sc in next stitch) 6 times, (18 sc)

Rnd 5: (2 sc in next stitch, 1 sc in next 2 stitches) 6 times (24 sc)

Rnd 6: (2 sc in next stitch, 1 sc in next 3 stitches) 6 times (30 sc)

Rnd 7: (2 sc in next stitch, 1 sc in next 4 stitches) 6 tmes (36 sc).

Rnd 8: ch3 (this counts as first dc), dc in same stitch, ch 1, 2dc in same stitch, *skip 2 sc, (2 dc, ch 1, 2 dc) in next sc* repeat from * to beginning chain. Join.  For extra help click here.

Rnd 9: Slip Stich to ch 1 space, (ch 3, dc, ch 1, 2dc) in first chain 1 space, (2dc, 1 ch, 2dc) in each ch 1 space around. Join.

Rnd 10-14: repeat Rnd 9

Rnd 15: ch 1, 1 sc in same stitch and in each stitch around, join

Rnd 16-17: repeat Rnd 15

Finish Off


12 MONTHS-3 YEARS

Same as 6-12 M0nths, but Repeat Rnd 9 one more time


CHILD SIZE: 3-10 Years

Rnd 1: ch 4, join to form ring

Rnd 2: 6 sc in ring, DO NOT JOIN (you may want to place a marker here to keep track of Rnd)

Rnd3: 2 sc in each sc of previous round (12 sc)

Rnd 4: (2 sc in next stitch, 1 sc in next stitch) 6 times, (18 sc)

Rnd 5: (2 sc in next stitch, 1 sc in next 2 stitches) 6 times (24 sc)

Rnd 6: (2 sc in next stitch, 1 sc in next 3 stitches) 6 times (30 sc)

Rnd 7: (2 sc in next stitch, 1 sc in next 4 stitches) 6 tmes (36 sc).

Rnd 8: (2 sc in next stitch, 1 sc in next 5 stitches) 6 times (42 sc)

Rnd 9: ch3 (this counts as first dc), dc in same stitch, ch 1, 2dc in same stitch, *skip 2 sc, (2 dc, ch 1, 2 dc) in next sc* repeat from * to beginning chain. Join.

Rnd 10: Slip Stich to ch 1 space, (ch 3, dc, ch 1, 2dc) in first chain 1 space, (2dc, 1 ch, 2dc) in each ch 1 space around. Join.

Rnd 11-16: repeat Rnd 10

Rnd 17: ch 1, 1 sc in same stitch and in each stitch around, join

Rnd 18-19: repeat Rnd 17. 


torsdag 10 maj 2012

Baby Mössa!


Your beautiful baby will be enchanting in this
sweet little blossom hat with it's little flower
petals. She will charm everyone she sees. I
designed it for my baby and now you can enjoy
the pattern too!

Materials ~
Sport weight yarn (yarn used in photo is Red
Heart Designer Sport in Blossom
Hook size F, G, H (depending on the size hat you desire)
Gauge is with size G hook, 5 dc sts are 1” across and 1 row is ½” tall

Sizes ~
Newborn – 3m ~ F hook
3m-6m ~ G hook
6m-9m ~ H hook


Basic Beanie hat begins ~
Ch4, slst to first ch to join in a ring.
R1, Ch3, (counts as first dc now and through out)11dc in ring. Slst to 3rd ch of
beginning ch3 to join. (12dc)
R2 Ch3, In BACK LOOPS only, now and through out, dc in same st as
joining, 2dc in each st around. Slst to join. (24dc)
R3 Ch3, In BACK LOOPS only, now and through out, dc in same st as joining, {1dc in next st, 2dc in
next st} around. Slst to join. (36dc)
R4 Ch3, In BACK LOOPS only, now and through out, dc in same st as joining, {1dc in each of the next
2 sts, 2dc in next st} around. Slst to join. (48dc)
R5 Ch3, In BACK LOOPS only, now and through out, dc in same st as joining, {1dc in each of the next
3 sts, 2dc in next st} around. Slst to join. (60dc)
R6-R11 Ch3, In BACK LOOPS only, 1dc in each st around. Slst to join. (60dc per row)

Begin Petals~
R12 ch1, sc in same sp as ch1.* Skip next st, [3dc, ch2, slst in top of
last dc made, (picot) 2dc] (petal) all in same st, skip next st, sc in next
st. * Repeat * around ending with a slst in the first sc.
(15 petals made) Finish off and weave in ends.


For all other rows of petals, join yarn in any free loop (front loops of
the basic beanie you started with, because we worked in the back
loops to make it) of any round after R5. (you need to have a multiple
of 5 for the petal stitches to work)

You can add petal rows in R5, R6, R7, R8, R9, R10, and R11 has a
row of petals. (R12) You can repeat the row of petals as many times
as you wish. In the main photo, I skipped a row in between each row
of petals. Placing petal rows in R11, R9, R7, and R5.


P.S. It's on Ravelry too. :)
P.P.S. If you make some for Christmas presents, post me a link. I love seeing your take on my patterns!


onsdag 8 februari 2012

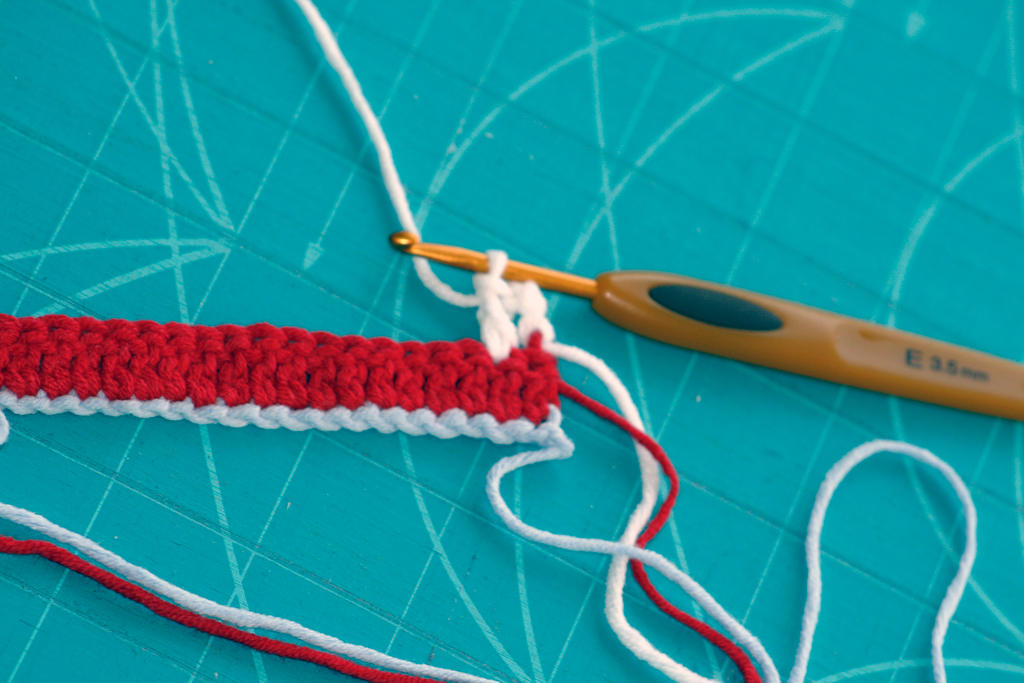
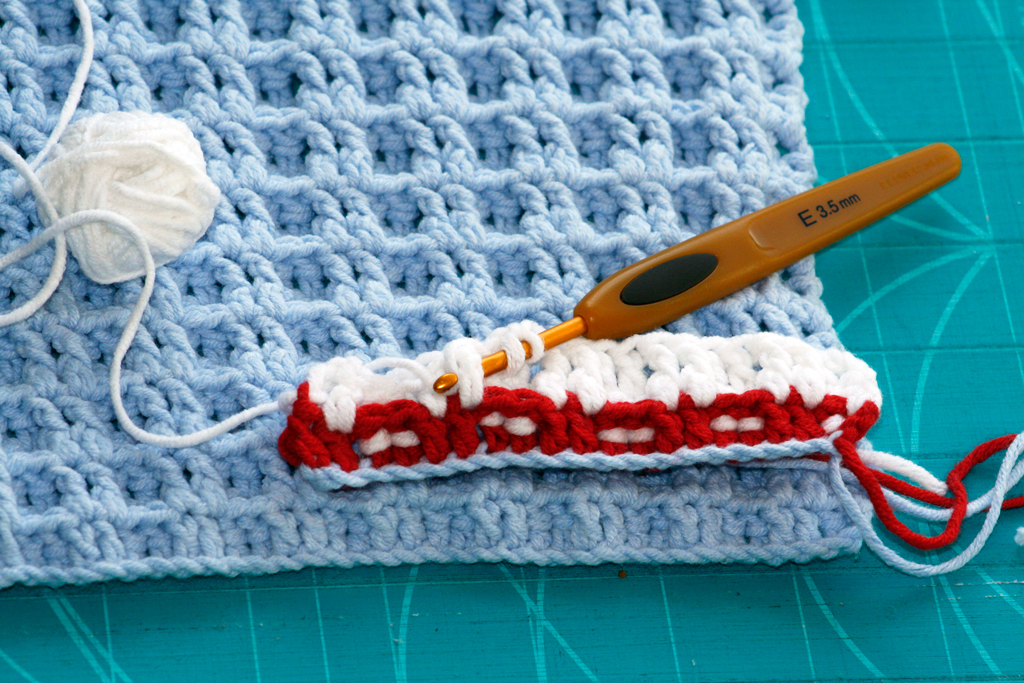
Våffelmönster!


Beskrivningen är till en Disktrasa men kan även användas till annat. 

1

Chain 42 (depends on the yarn of course, just remeber you will work in pairs).

2

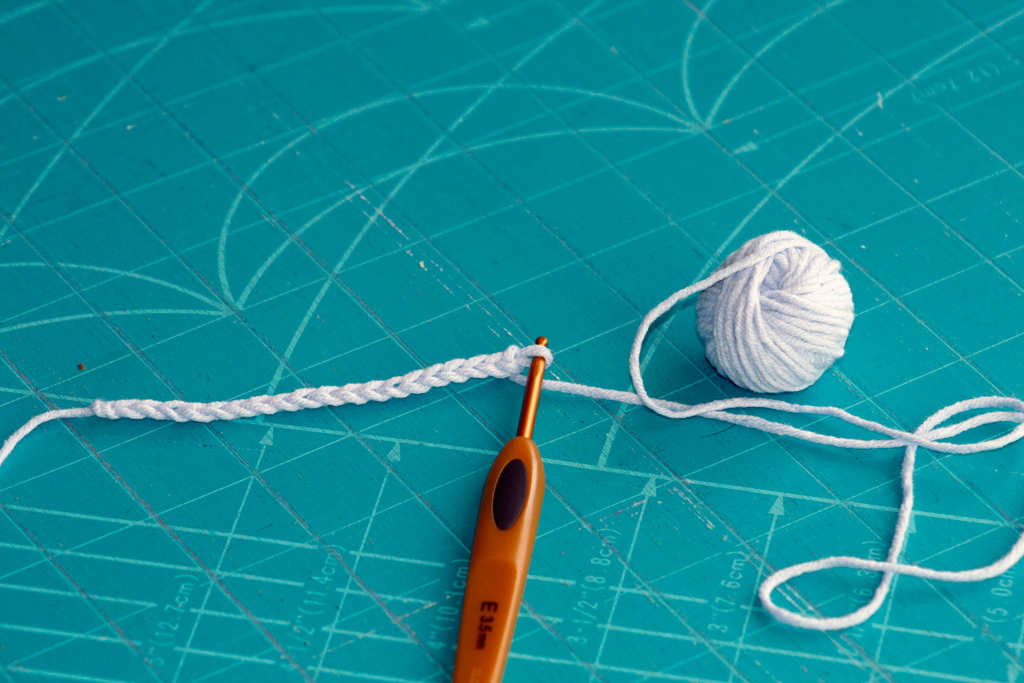
Then chain 3, counts as your first double chrochet, dc, stitch. (Red)

3

Continue with dc stiches until the end of the first row.

4

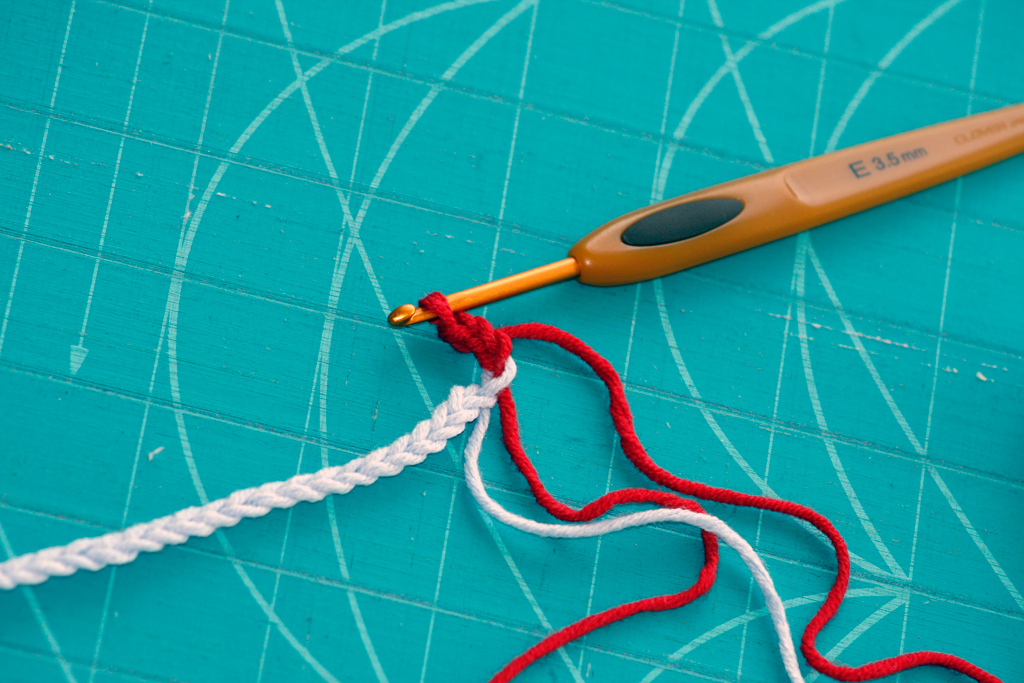
Second row (white) chain 3, counts as your first dc stich. Turn.

5

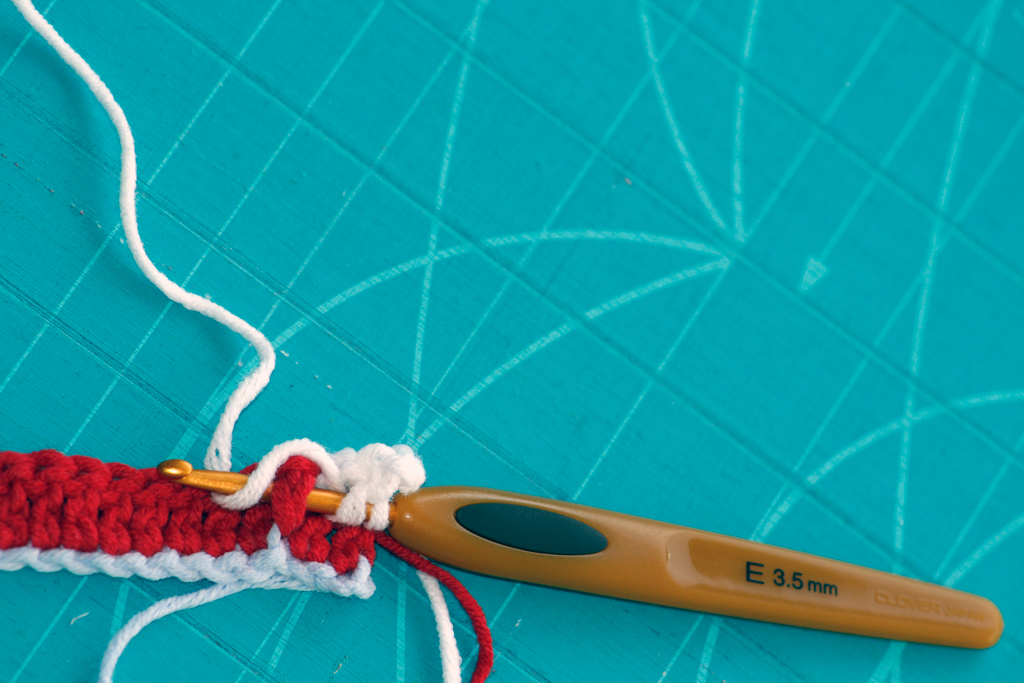
Then you make one dc stich, and that's your first pair. (Sorry it's a bit blur here but I was falling of the chair and under time pressure ;o)).

6

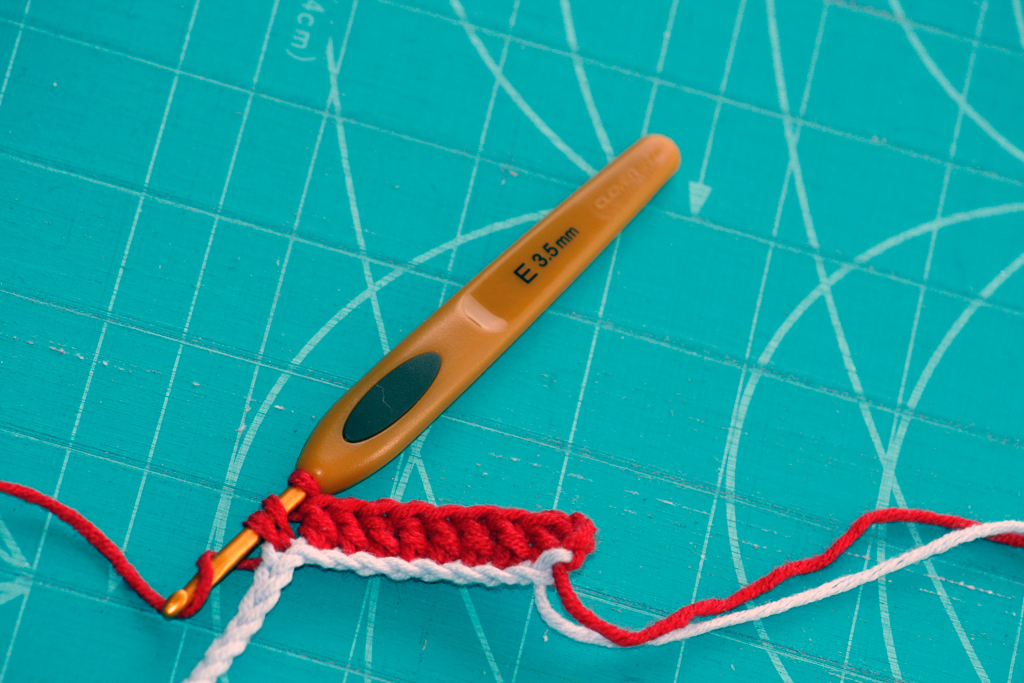
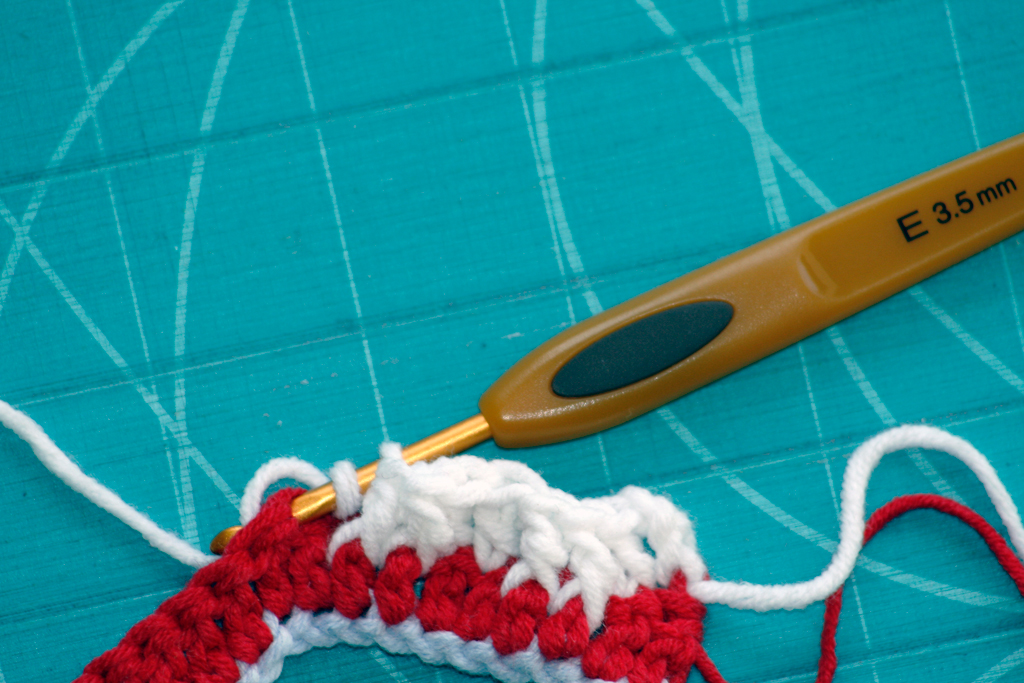
So now you make a dc stich around the 3rd dc stich on the first row. And then one more and that's your 2nd pair.

7

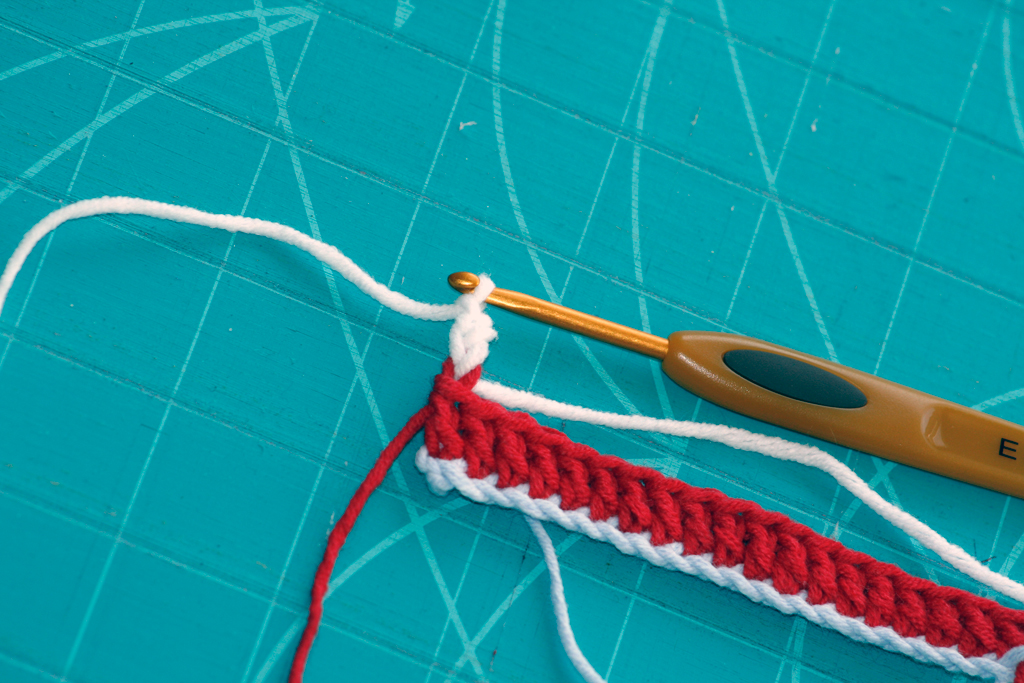
Work in pairs until the end of the row.

8

10

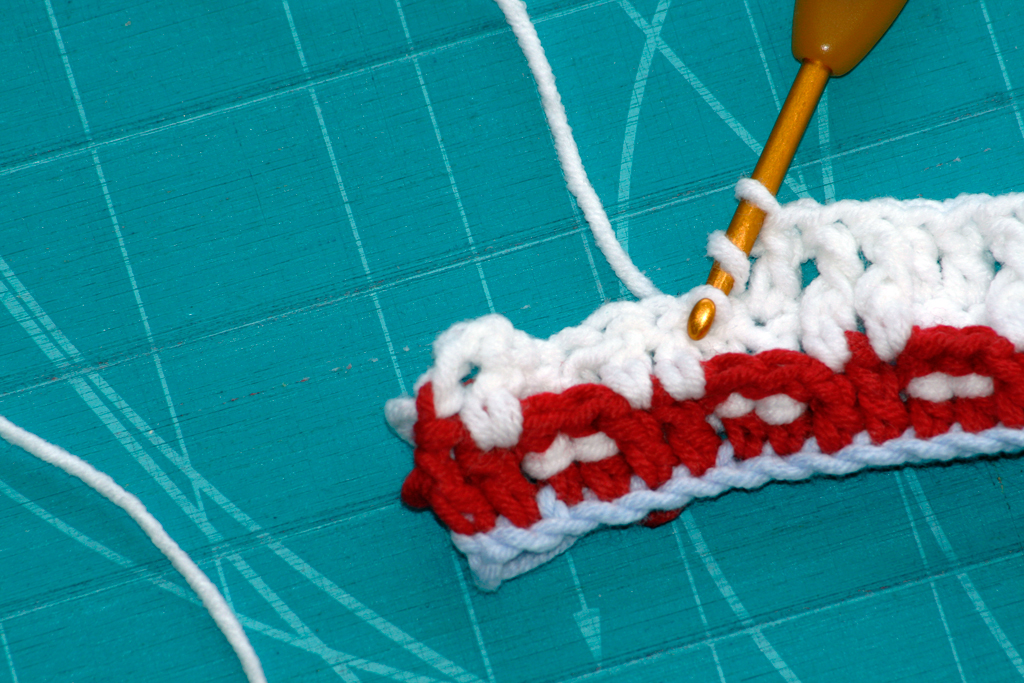
Then you just continue the same way until you have square.
Chain 3, always counts as your first dc, then one dc = first pair
Then you make one dc around the 3rd dc on the previous row and then one more = 2nd pair
And that's how you work your way until finished.

torsdag 22 september 2011

Musse & Mimmi mössa!


Mickey Mouse Clubhouse is my 3 year olds new favorite show and the inspiration for these crochet hats! I am sharing the pattern for newborn size, but will give you tips on how to make them in larger sizes.

Mickey and Minnie Mouse Crochet Hats
Size: Newborn

Materials:
- Medium worsted weight yarn in black, red and pink
- Size H (5.0) Crochet Hook
- Tapestry Needle
- Two 1" white buttons for Mickey hat, 1/2" or 1/4" white buttons for Minnie hat and bow.

Hat Pattern:
Note: Always begin your round in same stitch as your joining chain
Magic Ring, chain 1
10 HDC in magic ring, join to first HDC, ch 1
Round 2: 2 HDC in each around (20 HDC), join, chain 1
Round 3: 2 HDC, HDC in next, repeat around (30 HDC), join, chain 1
Round 4: 2 HDC, HDC in next 2, repeat around (40 HDC), join, chain 1
Round 5-9: HDC in each around (40 HDC)
Round 9-13: HDC in each around with red yarn for Mickey or pink for Minnie (40 HDC), fasten off, weave in ends.

Sew on two white buttons for Mickey Hat and smaller 1/4-1/2 inch white buttons to create polkadots for Minnie hat. I used six 1/4" buttons for Minnie's bow and nine 1/2" buttons for the bottom of the Minnie hat.


Ears (make 2):
Magic ring, chain 1
12 HDC in magic ring, pull tight, join to first HDC, chain 1
Round 2: 2 HDC in each stitch around (24 HDC), join, chain 1
Round 3: 2 SC, SC in next, repeat around (36 SC), fasten off but leave long tail for sewing onto hat
Sew ears between rows 3 and 6
*Make two ears and sew together for thicker, sturdier ears. I did this with the Mickey hat, but not for Minnie.


Minnie's Bow:
Chain 16,
Row 1: HDC in second chain from hook, SC in next 14, chain 1, turn
Row 2-5: HDC across (15 HDC)
At the end of row 5, do not turn, continue to SC around edges, join to first SC in row 5. Faston off, weave in ends.
- Scrunch the middle of the bow accordion style  and with a tapestry needle, sew yarn through the middle. - With long tail, wrap yarn the middle approx. 10-15 times. Tie off, but leave a tail for sewing onto hat.
I sewed the middle of the bow to the top center of the hat and also sewed the bow to the ears.


For bigger sizes:
Note: I have not tested the bigger patterns but it is what I use for basic increases.

0-3 Months:
Follow instructions above till Round 4
Round 5: 2 HDC, HDC in next 7, repeat around (45 HDC)
Round 6-14: HDC in each around (45 HDC)

3-6 Months:
Follow instructions above till Round 4
Round 5: 2 HDC, HDC in next 3, repeat around (50 HDC)
Round 6-15: HDC in each around (50 HDC)

6-9 Months:
Follow instructions above till Round 4
Round 5: 2 HDC, HDC in next 3, repeat around (50 HDC)
Round 6: 2 HDC, HDC in next 9, repeat around (55 HDC)
Round 7-16: HDC in each around (55 HDC)


To increase ear size, continue with Round 3 of the ear pattern above until they look proportional to the hat.
To increase bow size, increase the number of starting chains until length desired and then continue with rows of HDC's until it is as big as you would like it.

fredag 17 juni 2011

Japan skor


Bild och mönster har jag lånat här!

Gauge for this size is 4 sc and 4 rows are 1"
Begin at the top of the "T" shape by making a chain of 50. (It's about 12" long)
R1 In the second ch from the hook, make 1 sc, sc in each chain across. 49sc
R2 Ch1, turn, *sc in next st, dc in next st. Repeat from * across. 49 sts
R3 Ch1, turn, sc in each st across. 49sc
R4-7. Repeat row 2 and 3 in that order 2 times.
R8 Repeat row 3. Finish off and weave in ends. The "bumpy" side created by the sc, dc, sts is the right side. You want the bumpy side facing out. (This row, R8, is where you begin the sole/bottom of the slipper.)


{measurements before folding and sewing are 5" right side, 5" left side and 2" across the center sc rows}

R1 Now in the 21st st from the end, (this is almost the center of the slipper) join yarn, (to the 21st sc) ch1, sc in same st and in next 8 sts. 9sc.
***Now stop here and count, you should evenly have 20 sts on either side of this row and 9sc you are working in the center. Each side has 20 sts, center 9 sts. ;)
R2-20 Ch1, turn, sc in next 9sc. 9sc total. This makes the sole/bottom of the slipper. Finish off and weave in ends.
Optional, as photographed in the photos...do an rsc (reverse sc) across the top of the "T" shape to give the slipper a more finished look. Or any border/edging you like.


Lay slipper with wrong side up and the right side (bumpy side) facing down. Take the right side of the "T" shape and fold it over and match up the side to the bottom on the slipper. (to the sole's toe, made with 9sc) Now you will see the bumpy side on this part showing.


Take the left side and fold it over as well and in the same place. Place a clothes pin here if you need too, to hold all 3 thicknesses of the toe in place.


Turn the slipper over, very carefully so as not to move the folded pieces out of place. Begin at the top of the slipper, right side and wip stitch the right side down to the toe. Only sewing through the 1 side and the bottom/sole.


(I'm using a darker yarn to sew so you can see where to sew) now sew across the toe, sewing through all 3 thicknesses, the right side, the center/bottom/sole and the left side. Only going through all 3 thicknesses at the toe.


Sew up the other side, only sewing through the bottom/sole and the left side. Finish off and weave in ends. ***EDIT*** This big of a size really needs some stitching on the top of the slipper to help it stay on the foot. So when you try it on the child, see where the 2 top folded pieces meet and take it back off the child and then stitch right where the top pieces meet. You can also sew a little more down towards the toe on the top to help it have a better, tighter fit***


You may want to make a few small stitches on the top of the slipper, where the 2 sides meet just to help the slipper stay on the foot. Try it on first and see where you need to do this. Also, slippers made from yarn are very slippery. We found out the hard way, so go get some no slip stuff for the bottoms before wearing. :) Puff Paint works wonders. These are so cute and work up so fast, I'm going to make a few pairs to donate to charity this winter. ***In the photo, I have my sides folded right over left, then the other is folded left over right, so the line of the opening is pointing out, not in.
Hope you enjoyed this photo tutorial! Have a great afternoon!


fredag 15 april 2011

Sommar snäckmössa!

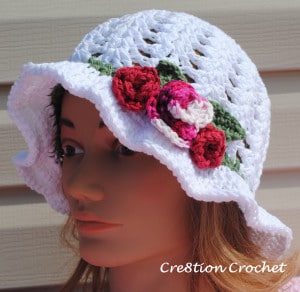
free pattern adult spring hat


Abbreviations and Stitches used:

st- stitch

sp- space

mc/r- magic circle/ring (watch this video tutorial

ch- chain

sl st- slip stitch
insert hook, yarn over, pull through, (two loops on hook), pull loop closest to hook through other loop

hdc- half double crochet
yarn over, insert hook, yarn over, pull through (three loops on hook), yarn over, pull through all three loops

dc- double crochet
yarn over, insert hook, yarn over, pull through (three loops on hook), yarn over, pull through first two loops on hook, yarn over and pull through last two loops


Materials:
5.5 m (I) hook for hat
4.0mm (G) hook for appliques
leaves
rossettes
100% cotton yarn in your choice of colors
embroidery needle


Gauge:
1st 2 rounds- 2.5”
Flat Circle- 6.25” (after round 5)

Finished Hat Size:
Lenght (not including brim)- 7.0″
Brim- 1.5″
Circumference- approx. 20.0”


Notes:
Use minimal tension when making this hat
Be sure to gauge your work


Pattern:

1. Mc/r with 12dc, join round with sl st

2. Ch 2.  skip 1st st. 2dc in next st and in every st around.  Last 2dc will be placed into the sp previously left empty.   Sl st into next dc to join round <24> Should measure 2.5″

3. Ch 2.  skip 1st st.  *1dc in next st.   2dc in next st.  Repeat from * around.  Last 2dc will be placed into the st previously left empty.   Sl st into next dc to join round <36>

4. Ch 2.  skip 1st st.  *1dc in next st.  1dc in next st.  2dc in next st.  Repeat from * around.  Last 2dc will be placed into the st previously left empty.   Sl st into next dc to join round <48>

5. Ch2.  Skip 1st st.  -1dc in next st.  1dc in next st.  1dc in next st.  2dc in next st.  Repeat from * around.  Last 2dc will be placed into the st previously left empty.  Sl st into the nest dc to join round <60>
This round should measure 6.25” when completed

6. Ch 2, 3dc in same st.  *Skip 3st.  4dc in next st.  Repeat from * around.  Join round with sl st <15 shells>

7. Sl st into next st, then sl st into the space between the next two posts (you will be in the center of the 4dc shell).  Ch 2, 3dc in same space.  *Skip next 3 sp.  4dc in next sp.  Repeat from * around.  Join round with sl st <15 shells>

8. Sl st into next st, then sl st into the space between the next two posts.  Ch 2, 3dc in same space.  *Skip next 3 sp.  4dc in next sp.  Repeat from * around.  Join round with sl st <15 shells>

9. Sl st into next st, then sl st into the space between the next two posts.  Ch 2, 3dc in same space.  *Skip next 3 sp.  4dc in next sp.  Repeat from * around.  Join round with sl st <15 shells>

10. Sl st into next st, then sl st into the space between the next two posts.  Ch 2, 3dc in same space.  *Skip next 3 sp.  4dc in next sp.  Repeat from * around.  Join round with sl st <15 shells>

11. Sl st into next st, then sl st into the space between the next two posts.  Ch 2, 3dc in same space.  *Skip next 3 sp.  4dc in next sp.  Repeat from * around.  Join round with sl st <15 shells>

12. Sl st into next st, then sl st into the space between the next two posts.  Ch 2, 3dc in same space.  *Skip next 3 sp.  4dc in next sp.  Repeat from * around.  Join round with sl st <15 shells>

13. Change to border color. *1hdc in to next three st.  1hdc in space between shells.  Repeat from * around, join round with sl st <60>

14. 1hdc in every st around <60>

15.Change back to hat color.  Ch 2.  skip next st. *2dc in each of next 9 st.  3dc in 10th sp.  Repeat from * around.  Last 3dc will be placed into the space previously skipped.   sl st into the next dc to join round <126>

16. Ch 2.  skip next st, 1dc in each sp around.  Last dc will be placed into the sp previously skipped, sl st into the next dc to join round <126>

17. Sl st around entire hat in back loops only.  Fasten off and weave in all ends


Add appliques of your choice, I used the following:

rosettes- 1 medium and 2 small

leaves- medium and small fat bottom leaves, 1 each

torsdag 14 april 2011

Sommar hat


HAT PATTERN:
Yarn: Cotton yarn (Sugar 'n Cream also works well with this pattern).
Hook size: F - 3.75mm

Make a magic circle.

Flat circle for the top:
Round 1: Ch 1, 7 sc through the loop. Do not join, place marker and work a continual round.
Round 2: 2 sc in each sc around (14 sc)
Round 3: *1 sc in the next stitch, 2 sc in the next stitch. Continue around from *. (21 sc)
Round 4: *1 sc in each of the next 2 stitches, 2 sc in the next stitch. Continue around from *. (28 sc)
Round 5: *1 sc in each of the next 3 stitches, 2 sc in the next stitch. Continue around from *. (35 sc)
Round 6: *1 sc in each of the next 4 stitches, 2 sc in the next stitch. Continue around from *. (42 sc)
Round 7: *1 sc in each of the next 5 stitches, 2 sc in the next stitch. Continue around from *. (49 sc)
Round 8: *1 sc in each of the next 6 stitches, 2 sc in the next stitch. Continue around from *. (56 sc)
Round 9: *1 sc in each of the next 7 stitches, 2 sc in the next stitch. Continue around from *. (63 sc)
Round 10: *1 sc in each of the next 8 stitches, 2 sc in the next stitch. Continue around from *. (70 sc)
Round 11: *1 sc in each of the next 9 stitches, 2 sc in the next stitch. Continue around from *. (77 sc)
Round 12: sc in each sc around. (77 sc)
Round 13: *1 sc in each of the next 10 stitches, 2 sc in the next stitch. Continue around from *. (84 sc)
Round 14: sc in each sc around. (84 sc). Slip stitch to the next 2 stitches.
You can adjust this flat top to fit your head by adding more or subtracting the last row (84 sts).

Hat body:
Round 1: Ch 3, 2 dc in the same stitch, skip 2 stitches, *3 dc in the next stitch, skip 2 stitches. Repeat from * till the last shell, join with the beginning chain. (28 shells - 84 sts)
Round 2: Ch 3, 2 dc in the same space, *3 dc in the next space. Repeat from * to the last space, join with the beginning chain. (28 shells - 84 sts)
From round 3: Repeat round 2 until you get the desired length.

Hat brim:
Round 1: Ch 1, sc in the same stitch, sc in the next 5 stitches, 2 sc in the next stitch. *sc in the 6 next stitches, 2 sc in the next stitch. Continue around from *. Do not join. (96 sc)
Round 2: sc in each sc around. (96 sc)
Round 3: *sc in the 7 next stitches, 2 sc in the next stitch. Continue around from *. (108 sc)
Round 4: sc in each sc around. (108 sc)
Round 5: *sc in the 8 next stitches, 2 sc in the next stitch. Continue around from *. (120 sc)
Round 6: sc in each sc around. (120 sc)
Round 7: sc in each sc around. (120 sc)
Round 8: *sc in the 9 next stitches, 2 sc in the next stitch. Continue around from *. (132 sc)
Round 9: sc in each sc around. (132 sc)
Round 10: sc in each sc around. (132 sc)
Round 11: sc in each sc around. (132 sc)
Slip stitch (or reverse sc all around) the last round.

There you have the hat pattern, appreciate if you point out any mistake I might have. Thank you!

söndag 10 april 2011

Fågel


You can use any yarn with appropriate size hook for this.  The yarn type & hook size will determine the finished size of the chick. The yellow one is made with worsted weight yarn & a 5mm hook. The finished size is 2.75 inches beak to tail & 2.5 inches top to bottom.

Here is the basic technique.
ch = chain
sl st = slip stitch
sc = single crochet
dc = double crochet
hdc = half double crochet
trc = triple crochet
quadc = quadruple crochet, yo 3 times, insert hook into st, pull up loop, yo pull through 2 loop 4 times
pentc = penta crochet, yo 4 times, insert hook into st, pull up loop, yo pull through 2 loops 5 times

Sorry for the weird names of quadc & pentc, but I don't know the names of these stitches, so I called them what made sense to me. Does anyone know their official name? Couldn't find it on google.

R1 - 10 sc in a magic loop. If you don't know how to crochet in a magic loop you can watch a video here.  Tighten your magic loop but do not join with a slip stitch as you may be accustomed to doing. Instead just make the first stitch on the second round in the first sc of the first round.

R2 - 2sc in the first st (you may want to mark the first sc with a stitch marker), sc in 2nd, hdc then dc in 3rd, 2dc in 4th and 5th, 2sc in 6th, sc then dc in 7th,  2 trc in 8th, 2 quadc in 9th,  2 quadc in 10th. Again do not join.

R3 - Now your next stitch should be the first sc of the second round. In this stitch do 2 quadc & 1 pentac. Ch1, sl st in the same space (this will give a tiny point to the tail feathers). Now sl st down the side of the pentc going right to left. Join when you meet up with the next stitch.  It will look like this.


Now you should see the shape of the chick, but the tail part has such long stitches that it doesn't hold together.  So, tie off leaving a long tail to sew with. Flip the chick over and sew up and down the backs of all those stitches.  You will see little loops going up the back of each stitch.


Sew up and down under these little loops in rows to secure your stitches together.


For the eye sew a french knot between the 7th & 8th stitch of the second round. I first sewed a small straight stitch between the two catching a few threads from each and then sewed the french knot into the straight stitch to give it something to hold on to.

For the beak - join beak yarn in the 10th stitch of the second row. sc in the same stitch. fasten off and weave ends.

lördag 2 april 2011

Baguette Väska


WW yarn. Red Heart is best b/c it is stiff and sturdy
G or H hook
1" button

R1 Ch50, 6dc in the 4th ch from the hook. (the first skipped 3 chs count as the first dc) dc in the next 45 chs, 7dc in the last ch, along the opposite side of the chain, dc in the remaining 45 chs. Join with a slst to the first dc. (104dc)

R2 Ch3, dc in same st, 2dc in the next 6 sts, dc in the next 45 chs, 2dc in the next 7 sts, dc in the remaining 45 sts. Join with a slst to the first dc. (118dc)

R3 Ch3, dc in the same sp, dc in the next st, *2dc in the next st, dc in the next st. * 6 times, (so far you have 21dc) dc in the next 45 dc, *2dc in the next st, dc in the next st* 7 times, dc in the last 45 dc. Join with a slst to the first dc. (132dc)

R4 Ch3, In Back Loops Only, dc in each st around. Join with a slst to the first dc. (132dc)

R5 Ch2, (does not count as a st now and through out, just brings you up to stitch level) Fpdc around same st as joining, fpdc around each st around. Join with a slst to the first fpdc. Skipping the beg. ch2. (132 fpdc)

R6-R14 Ch2, Fpdc around same st as joining, fpdc around each fpdc. Join with a slst to the first fpdc. Skipping the beg. ch2. (132 fpdc) (You can keep repeating these rows untill it is as tall as you like)

R15 (Making pleats in this row) Ch1, sc in same sp, sc in the next 38 sts, skip 4 sts, sc in the next 2 sts, skip the next 4 sts, sc in the next 57 sts, skip the next 4 sts, sc in the next 2 sts, skip the next 4 sts, sc in the last 16 sts. Slst to the first sc to join. (115 sc)

R16 Ch2, dc in the same sp, dc in each sc around. Join with a slst to the first dc. Skipping the beg. ch2. (115 dc)

R17 Ch1, sc in same sp, sc in each st around. Slst to the first sc to join. Finish off and weave in ends. (115 sc)

Loop

R1 Find the center 4 sts right above the center pleats on back row, (where you join rounds). Attach yarn to the last row (top sc row) back loops right above the pleats, ch3, dc in next 3 sts, (all 4 dc should be directly centered above the center pleats).

R2 Turn, ch1, sc in same sp and next 3 sts. (4sc)

R3 Turn, ch3, dc in the next 3 sts. (4dc)

Repeat R2 and R3, 2 times, Turn, ch3, dc in next st, ch4, dc in last 2 sts. (4dc and 1, ch4 sp)

Turn, ch1, sc in same sp and next dc, 5sc in the ch4 loop, sc in last 2 dc and finish off.

Sew button to the other side in the center, above the pleats on R16. (the dc row)

Straps~ Here you make 2 straps, 1 on the front and 1 on the back. It is the same sts as the Loop. Just center the straps in place on either side of the pleats.

R1 Attach yarn in desired location for the handle, ch3, dc in next 3 sts. (4 dc) (I went 12 sts to the left of the center pleats, attached my yarn and made my 1st. four sts here. Then when desired length of strap is achieved, attached to the corresponding # of sts on the right side of the pleats. So they are centered on either side of the pleats.)

R2 Turn, ch1, sc in same sp and next 3 sts. (4sc)

R3 Turn, ch3, dc in the next 3 sts. (4dc)

Repeat R2 and R3, as many times as needed to get the desired length of strap. Finish off, leaving a tail long enough to sew the strap onto the other side of the pleats. Repeat on the opposite side.

tisdag 15 mars 2011

Virknåls förvaring!


Needdlecase2

Supplies:

3 different colors of Crochet Cotton Size 10 or fingering  weight yarn (this is a thinner yarn than the worsted weight stuff)
crochet hook: size D
paper towel tube
small piece of sturdy cardboard
white sheet of paper (the tube shows through in parts, and white is just prettier than that brownish color)
yarn needle
Gauge:
1 square should measure approximately 1-3/4" across.

Make the circles (make 2):
Make a slip knot and chain 1.
Round 1:  8 sc in the beginning slip knot. Join with sl st to first sc. Ch 1, do not turn.
Round 2:  2 sc in joining st, and in each st around, 16 sc. Join with sl st to first sc. Ch 1, do not turn.
Round 3:  1 sc in joining st, * 2 sc in next st, 1 sc in next st *. Repeat from * to * all the way around, 24 sc. Join with sl st to first sc. Fasten off. Ch 1 with a new color, do not turn.
Round 4:  1 sc in joining st, 1 sc in next st,  2 sc in next st. *sc in next 2 sts, 2 sc in next st*. Repeat from * to * all the way around, 32 sc. Join with sl st to first sc. Ch 1, do not turn.
Round 5:  1 sc in joining st, 1 sc in next 2 sts,  2 sc in next st. *sc in next 3 sts, 2 sc in next st*. Repeat from * to * all the way around, 40 sc. Join with sl st to first sc. Fasten off.

Yippee! You have finished a circle! Now make another one more for the other end of the tube.

The Circle Square (make 8):----I know it sounds funny, but I didn't know what else to call it.
Make 8 more of the circles described above. The next round will turn your circles into squares.

Round 6: Join and ch 3 with white (or some other color as desired). * Hdc in next 2 sts, 5 sc in the next 5 sts, 2 hdc in the next 2 sts, in the next st make 1 dc, ch 2, 1 dc (this makes a corner) *. Repeat from * to *, 3 more times. On the last repeat, you will end with a 1 dc, ch2, and then sl st into the second chain of the beginning ch 3.

Joining:

Stack 2 squares with right sides facing.
Sc along one edge through both pieces so that you are joining the two squares together.
Repeat this step 3 more times.
Top:

Choose one of the sets to be the top. Repeat the "Joining" step on the other side of the squares to make a tube.
Turn inside out and whip stitch one of the circles to one end of the tube.
Bottom:

Repeat the "Joining" step three more times along the long edges of the joined squares to make a piece that is 2 squares across by 4 squares down.
Fold the piece in half long ways and repeat the "Joining" step along the long edge to form a long tube.
Turn inside out and whip stitch the other circle to one end of the tube.
Putting it all together:

Note: the shorter of the two crocheted tubes will be the "top" and the longer one will be the "bottom".
From the sturdy piece of cardboard, cut 2 circles (1-5/8" diameter). Insert these circles into the bottom ends of the two tubes you just crocheted.
Cut off a 1-3/4" section of the paper towel tube. Cut a piece of white paper to measure 1-3/4" x 6". Tape this white sheet to the outside of the tube.Insert the tube into the "top" crocheted piece. This may take a bit of stretching but if your piece is crocheted to gauge, it should fit nice and snug. Note: If it absolutely will not fit, don't despair! You can simply cut the length of the tube, remove 1/4" or so and re-tape it.
Cut off a 7" section of paper towel tube for the "bottom". Before covering this tube with a piece of white paper ( 6-1/4" x 6-1/4"), make sure to slice the tube along it's length and remove about 1/4". Re-tape the tube and tape on the paper. Making this piece a little narrower than the top piece ensures that the top slides easily over the bottom when closing up your needle case!
Insert the tube into the bottom crocheted section. A slight twisting motion helps if it is a little bit snug.The crocheted edge should come up to the edge of the white sheet of paper
Fill 'er up crocheters!